Directions to Make a Labyrinth
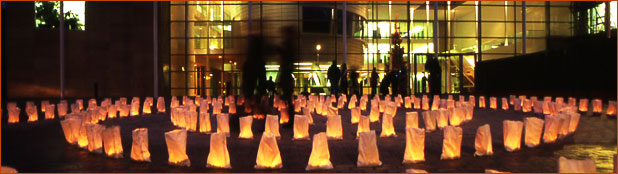
Few things are more rewarding than to create a labyrinth and walk it afterwards. The love and care that go into the building - and in the walking - add to the transformative benefits of the labyrinth.
This part of the website will teach you how to make your own labyrinth. Currently, we have just directions for the Masking Tape Chartres Labyrinth. In the future, we will be adding Baltic, Classical, and Concentric labyrinth directions as well as tips for use of materials and other information to help you in your labyrinth-building efforts.
5 Getting Started
The guide needs to be securely fastened to the center of the labyrinth. One way is to put a toilet plunger in the center of the labyrinth, have someone stand on it (or tape it to the floor, or put a barbell weight over it) so that it can't move. Attach the guide. If you sare using rope, then a loop will suffice. Be sure that you make your marks for the circles after tying the loop. If using a metal tape measure, saw off the handle of the plunger so it only sticks up an inch or so. Hammer a nail into the top of the handle and hook the tape measure on it. If there is no hole in the tape measure, wrap masking tape around the end of the tape measure so that it sticks out beyond the end, and put a hole in the masking tape. Or you could just have someone hold a broomstick. If that's the case, you may still want to tape it down in some fashion or at least mark its spot on the floor, because volunteers have a way of losing concentration and inadvertently moving the broomstick or plunger, thereby throwing off the measurements. You may think up other ways to attach the rope. It must have free 360-degree movement. If using a tape measure, you may be able to put a board on the floor, hammer a nail at the desired center point, and slip the end of the tape measure over the nail.
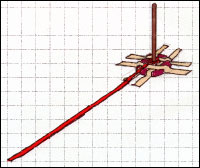
Since I make labyrinths frequently, I have constructed a round board with a one-inch hole in the middle. Over that hole I have placed a floor flange, which is found in the plumbing department of any hardware store. It can be screwed down, and has threads that allow you to screw a pipe into it. Inside the pipe I have jammed a wooden dowel with a nail in the top. With this system, I mark the center of the labyrinth with an X, then place the flat wooden piece (it doesn't have to be round) over the center-to-be of your labyrinth, looking through the hole in the flange to make sure it is centered on the X. If taping the board to the floor, this is the time to do it. In my case, I screw the pipe into the flange and then lower a 20-kilo barbell weight over the pipe, to hold it down without moving.
You can wait until the guide is attached to the center post to lay out the marks for the twelve concentric circles, measuring out from the center. The first mark will be equal to the radius of the circle. For our example, we are making a 36-foot circle with a nine foot center, the radius of which is 54. On rope, you can make a mark with a felt tipped pen or magic marker. On a metal measuring tape, you can make the mark directly on the guide by wrapping a piece of tape at the designated point. Then each additional path will be spaced according to the appropriate calculation that you made at the beginning. For our example, that is 14 and 3/4 inches apart. In such case, the second mark will be 54 inches plus 14 and 3/4 inches, or 68 and 3/4 inches. The third mark will be 68 and 3/4 inches plus 14 and 3/4 inches, and so forth, until all of the marks are completed.