Directions to Make a Labyrinth
Few things are more rewarding than to create a labyrinth and walk it afterwards. The love and care that go into the building - and in the walking - add to the transformative benefits of the labyrinth.
This part of the website will teach you how to make your own labyrinth. Currently, we have just directions for the Masking Tape Chartres Labyrinth. In the future, we will be adding Baltic, Classical, and Concentric labyrinth directions as well as tips for use of materials and other information to help you in your labyrinth-building efforts.
7 Connecting the Dots

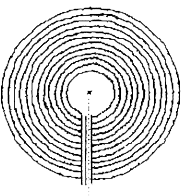
Next, make concentric circles by laying down the three-inch masking tape directly over all of the little tape markers. If you have long continuous pieces of tape, it will be easier to pull up when it comes time to remove the labyrinth again. Since you are making a curved line, the tape doesn't lie flat. Through practice you will develop some ways of tucking it or turning it.
Here's how I do the tape. I sit on the inside (towards the center) and work in a clockwise direction. As I make an arc with the tape, one edge of the tape will be fully stretched (the outside of the line, which is the edge further away from me). The other edge (closest to me) will be slightly shorter. I pull the tape to its full distance on the outside edge, pulling it to my right. Holding it in place, I brush the inside edge back towards the left. This causes it to make a little tuck in the tape.
